 Zoho yesterday announced few updates to Zoho Notebook. There are couple of new features added to Notebook.
The key new features in this update include…
- New Zoho Notebook Plug-in (beta)
- Google Notebook Import
- New Text Page
New Zoho Notebook Plug-in (beta)
A new Firefox plug-in is available here for Zoho Notebook. After you install the new plug-in, you’ll see the Notebook icon appear in the bottom right corner of the status bar. Clicking on the icon, you can view all your existing notebooks or create a new notebook, add a page and add text within the page. The content added to the plug-in will automatically be synchronized to the online version of Zoho Notebook.
Currently, the plug-in displays text-only content. The new plug-in also has the option to take screenshots of web pages and upload these images directly to Zoho Notebook Page. You can also take screenshots of portions of web pages and have them automatically uploaded to Zoho Notebook.
Google Notebook Import
You can import Google Notebooks into Zoho Notebook in three easy steps and less than five minutes. After you login to Zoho Notebook, you’ll see an ‘Import Google Notebooks’ option on the top right. Click on this link will get you started.
Here are the three steps to import your Google Notebooks
- Install our new Zoho Notebook Plugin (the one I mentioned above) and restart your browser
- Login to Zoho and Google Notebook
- Go to this URL - chrome://zoho-notebook/content/g2z.html - and click on Start
New Text Page

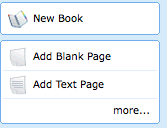
A new page type called ‘Text Page’ is added which essentially lets you add text to the page, ordered vertically. You can reorder the text objects in this page by dragging the text objects vertically. To add additional text to the page, use the ‘Add Text’ object on the left.
The content added to Notebook using the new plug-in will be added with this new page type.
More details available on Zoho blog.

No comments:
Post a Comment